Tag Archives: Pyplate

Responsive Web Design

I’m interested in developing responsive themes. The themes on my current sites are somewhat responsive, but they aren’t built on a responsive CSS framework. I’ve been looking at the following CSS tools to generate responsive themes:

http://getbootstrap.com/
https://developers.google.com/web/starter-kit/
http://foundation.zurb.com/
https://html5boilerplate.com/

I want to be able to build HTML5 sites like these, where pages are divided into sections. This seems to be the direction that front end design in going in – the sites I listed look modern, and they all look great on a range of devices.

Making themes adapt to different sized screens can be done with CSS media queries. The use of rows and columns is an important factor in CSS frameworks. It’s important that each row is divided into columns in such a way that each row is the same width.

Each section needs to be contained in a different div with its own CSS styling. In every CSS theme, there need to be a number of sub-themes for different sections. Writing CSS code for themes could get very complicated, so it might be worth using a CSS preprocessing tool like SASS.

I also need to give consideration to page navigation. It’s common to use a page menu at the top of pages containing links to HTML anchors so that users don’t have to scroll down long pages.

I’m working on implementing these changes in Pyplate. This is mostly a matter of redesigning themes. I am making some changes to the Python code of my CMS in order to handle page navigation widgets, and to divide pages into sections.

As soon as I get time, I need to spend some time reading this: http://learn.shayhowe.com/advanced-html-css/performance-organization/
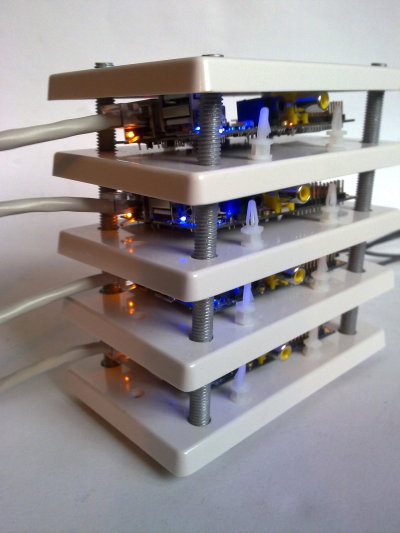
I’ve published a new web site

I’ve published a new site on my Banana Pi cluster. It’s called Linuxwebservers.net. I’ve started by writing some posts about Apache and its configuration files. I’ll write some basic articles about Nginx next, and then I’ll write some articles about setting up different web development programming languages.

I’m still thinking about using Gluster in the Banana Pi cluster. I’ve read that offloading file access to network storage can improve the performance of web server nodes, especially when the storage nodes have fast storage like SATA 3 hard disks, and the server nodes have slower storage in the form of class 10 SD cards.  I have a feeling that performance won’t be as good as it is with content stored locally on each server, but there’s only one way to find out for sure – I need to set it up and try it.

There is a new blog on pyplate.com at blog.pyplate.com. It’s a journal of Pyplate related work that I’ve been doing recently, and it is also hosted on the Banana Pi cluster. I still need to do some work on the blog. The publishing date needs to be displayed underneath the title of each post. I also need to reverse the order that posts are displayed in, so that newer posts will be at the top of the page.

Running several sites on a Banana Pi server

I’ve been doing some work on Pyplate CMS.  I’ve upgraded it so that I can run several sites on a single server, and I’ve also added support for MySQL to Pyplate.  I’m calling the new version Pyplate Multi-Site.

Now I can create a very simple mass blogging system on my Banana Pi cluster by installing Pyplate Multi-Site on each server in the cluster and make sure that they are synchronized.  This is an improvement on the Raspberry Pi cluster which can only serve one site.

I haven’t released the updated code yet.  I need to do more testing and update the Pyplate installation scripts.

So far I have only tested Pyplate Multi-site with Nginx.  If I want to use it with Apache, I will need to use mod vhosts in order to set a different web root folder for each site.  I haven’t tested it yet, but I will over the next few weeks.

In the short term I need to keep working on the Banana Pi cluster and get the upgraded version of it online so that I can start building some new sites.

Setting up a home page on a Pyplate site

I was recently asked how to set up a home page on a Pyplate web site. You need to do two things to make this work:
1. Create a new layout in the Site Settings field in the Admin area,
2. Edit the database record for page /main.html to use the new layout when this page is served.

To add a new layout, go to the Admin Area’s Site Settings page, and look for the post layout formatting code. It should look something like this, depending on which version of Pyplate you’re using:

 if layout == "post_layout":
 return post_layout.format(
 banner=pyplate.getFile(pyplate.getCMSRoot() + "/template/banner.html"),
 navbar=pyplate.getFile(pyplate.getCMSRoot() + "/template/navbar.html"),
# navbar=pyplate.get_navbar(dbase),
 banner_ad=pyplate.getFile(pyplate.getCMSRoot() + "/template/bananapi_responsive.html"),
 sidebar=sidebar_str,
# sharing=pyplate.get_sharing_template(),
 sharing=pyplate.get_sharing_buttons(path, page.title,page.description),
 breadcrumbs=pyplate.get_breadcrumbs(dbase, page.posts[0]),
 posts=post_str,
 section_menu=pyplate.get_category_menu(dbase, page.category, True, "More from this category:"),
 comments=pyplate.get_comment_template(),
 footer=pyplate.getFile(pyplate.getCMSRoot() + "/template/footer.html"))

Copy that code and paste it directly below the post_layout code. On the first line of th enew block, change post_layout to homepage_layout

#
# Copy the post_layout and change the layout string to homepage_layout
#
 if layout == "homepage_layout":
 return post_layout.format(
 banner=pyplate.getFile(pyplate.getCMSRoot() + "/template/banner.html"),
 navbar=pyplate.getFile(pyplate.getCMSRoot() + "/template/navbar.html"),
# navbar=pyplate.get_navbar(dbase),
 banner_ad=pyplate.getFile(pyplate.getCMSRoot() + "/template/bananapi_responsive.html"),
 sidebar=sidebar_str,
# sharing=pyplate.get_sharing_template(),
 sharing=pyplate.get_sharing_buttons(path, page.title,page.description),
 breadcrumbs=pyplate.get_breadcrumbs(dbase, page.posts[0]),
#
# Instead of using the post_str variable to fill the posts field, 
# use this line 
#
 posts=pyplate.getPost(pyplate.getCMSRoot() + "/content/main.html", "/content/main.html", ),

 section_menu=pyplate.get_category_menu(dbase, page.category, True, "More from this category:"),
 comments=pyplate.get_comment_template(),
 footer=pyplate.getFile(pyplate.getCMSRoot() + "/template/footer.html"))

Next, set the layout field to homepage_layout in the database.  You need to edit the layout field for /main.html. If you’re using a newer version of Pyplate with imort/export control in the Admin Area, then you can just export the database. Open /usr/share/pyplate/database/postindex.xml, and look for the record that contains main.html. Change the layout field to look like this:

<layout>homepage_layout</layout>

Click the import button to import the changes into the database. Then restart your server.

If you’re using an earlier version of Pyplate with no import/export buttons, you need to copy the database from /usr/share/pyplate/database/pyplate.db to a PC. Then you can install Sqlite Studio to edit the database: http://sqlitestudio.pl/. Copy the updated file back to your server and restart it.

Banana Pi server cluster

Banana Pi server cluster

Banana Pi server cluster

I built a Raspberry Pi cluster a few months ago, and it’s been very reliable. Performance has been surprisingly good, and the cluster has shown to handle a reasonable amount of traffic.

I recently got my hands on four Banana Pis, a Raspberry Pi clone with a dual core processor and gigabit ethernet.  I’ve built another cluster and got it on line at BanoffeePiServer.com.  This cluster has half the number of nodes in the RPi cluster, but it’s much more powerful.

I’ve used a newer version of Pyplate CMS which is much more efficient, and I’ve used a much more efficient mechanism to synchronize the servers.  Pyplate uses an SQLite database, so there’s no need for database replication.  The entire CMS can be copied to each node with rsync.

This page explains how I built the Banana Pi cluster.

A new version of Pyplate CMS is now available

It’s a long time since I posted here. I’ve been working on Pyplate, my Python CMS. Over the last few months I’ve made a lot of changes to the UI. Most site administration tasks can now be done via the Pyplate UI.

I’ve modified Pyplate to use the WSGI server interface instead of CGI. With CGI, the Python interpreter has to be loaded everytime a script is executed. Using WSGI means that a Python interpreter is kept in memory between requests. When a script needs to be executed it can run immediately because the interpreter has already been loaded. This has no effect on page load times of static pages, but dynamic pages are served much more quickly. The difference is huge.

There are different implementations of WSGI for different servers. In order to use WSGI with Apache, libapache2-mod-wsgi must be installed. This ensures that a python interpreter is loaded into each Apache thread. The downside of this is that each thread takes up more memory.

With Nginx, people often use set up a uWSGI server.  Nginx must be configured to pass requests for scripted pages to the uWSGI server. The uWSGI server executes a script, and returns the result to Nginx, which then passes the page back to the user who requested it.

I’ve also implemented a very simple webserver based on the WSGI class in the Python library. This server can handles static pages. If a requested file can’t be found, the server hands the request to Pyplate.  Pyplate generates the page, and returns it to the server.

The Python server is not very fast. It’s slower than Apache, and enabling page caching doesn’t make much difference. On the upside, it is very easy to set up.

I’ve added some security patches to Pyplate. A security token is embedded in each form generated by Pyplate. When a user clicks on the submit button, the security token is sent to the server with the POST request, and validated. I’ve also made some changes to the cookie code to make it harder to steal user’s cookies.

User information is now stored more securely. A salt is used to encrypt each user’s password, and a different salt is generated for each user.

I think Pyplate has come a very long way. It’s now a much more complete, more usable CMS. It’s still pretty simple, and small enough to run quickly.

What’s next? I’m working on a site built on a Banana Pi cluster. I’m building it using Pyplate, and it’s going to be based on my Raspberry Pi site. I may add a few more articles to my Raspberry Pi site, but eventually I plan to get back to working on Pyplate.


Pyplate now works with Nginx

I’ve written an install script that installs Pyplate for use with Nginx.  You can read the instructions here: http://www.pyplate.com/install-pyplate.

I’ve set up a Pyplate forum so that you can ask questions about Pyplate and get help with any technical issues.

Beta testing continues…

I announced the start of Pyplate beta testing on the Raspberry Pi forum.

I’ve had a little feedback already, and so far it’s been mostly positive. There was an issue with some scripts that didn’t have the right permissions, but I’ve fixed that now.

I’ve also posted an article on my Raspberry Pi site about installing Pyplate on a Pi.

Heading towards beta testing

I’m still tweaking and tuning my CMS in preperation for beta testing. I’ve ironed out most of the bugs, and the CMS works pretty smoothly now.
I’ve added the CKeditor to the editor page. It’s a Javascript rich text editor that can be embedded in pages to create a tool bar in text areas.

CKEditor in Pyplate UI

CKEditor in Pyplate UI

I considered using Tiny MCE – they both seem pretty good. For the moment, I’m happy with CKEditor.

I’ve added character checking on UI input fields for file and directory names. I limited the choice of characters to A-Z, a-z, 0-9 and these symbols: space . _ – This is a bit restrictive. The main objective is to prevent people from using characters that shouldn’t be used in file names. I definitely need to prevent people from using slashes in file names, other wise they could choose a file name like ../../../somepath. This could potentially allow people to overwrite files outside of the CMS.

There’s now a mechanism for uploading themes. Themes consist of a file named theme.css and layouts.py in a directory named after the theme. For the Minimal theme, there’s a folder called /usr/share/pyplate/themes/Minimal. Themes are uploaded as a zip file, and then unpacked into the themes directory. The zip file is copied to Pyplate’s backup directory in case you want to reinstall the theme.

I still need to write some more articles about how Pyplate works, and I need to write a few how-to articles. The next steps are to update the settings on my reverse proxy so that my site is accessible from the internet. Then I can start beta testing…